Create a Unit Calendar in Outlook
This guide explains how to create a shared calendar in Microsoft Outlook (Web), grant edit access to your co-Unit Leaders, and generate an ICS link to share with your participants.
Note The owner of the calendar should be the main unit leader.
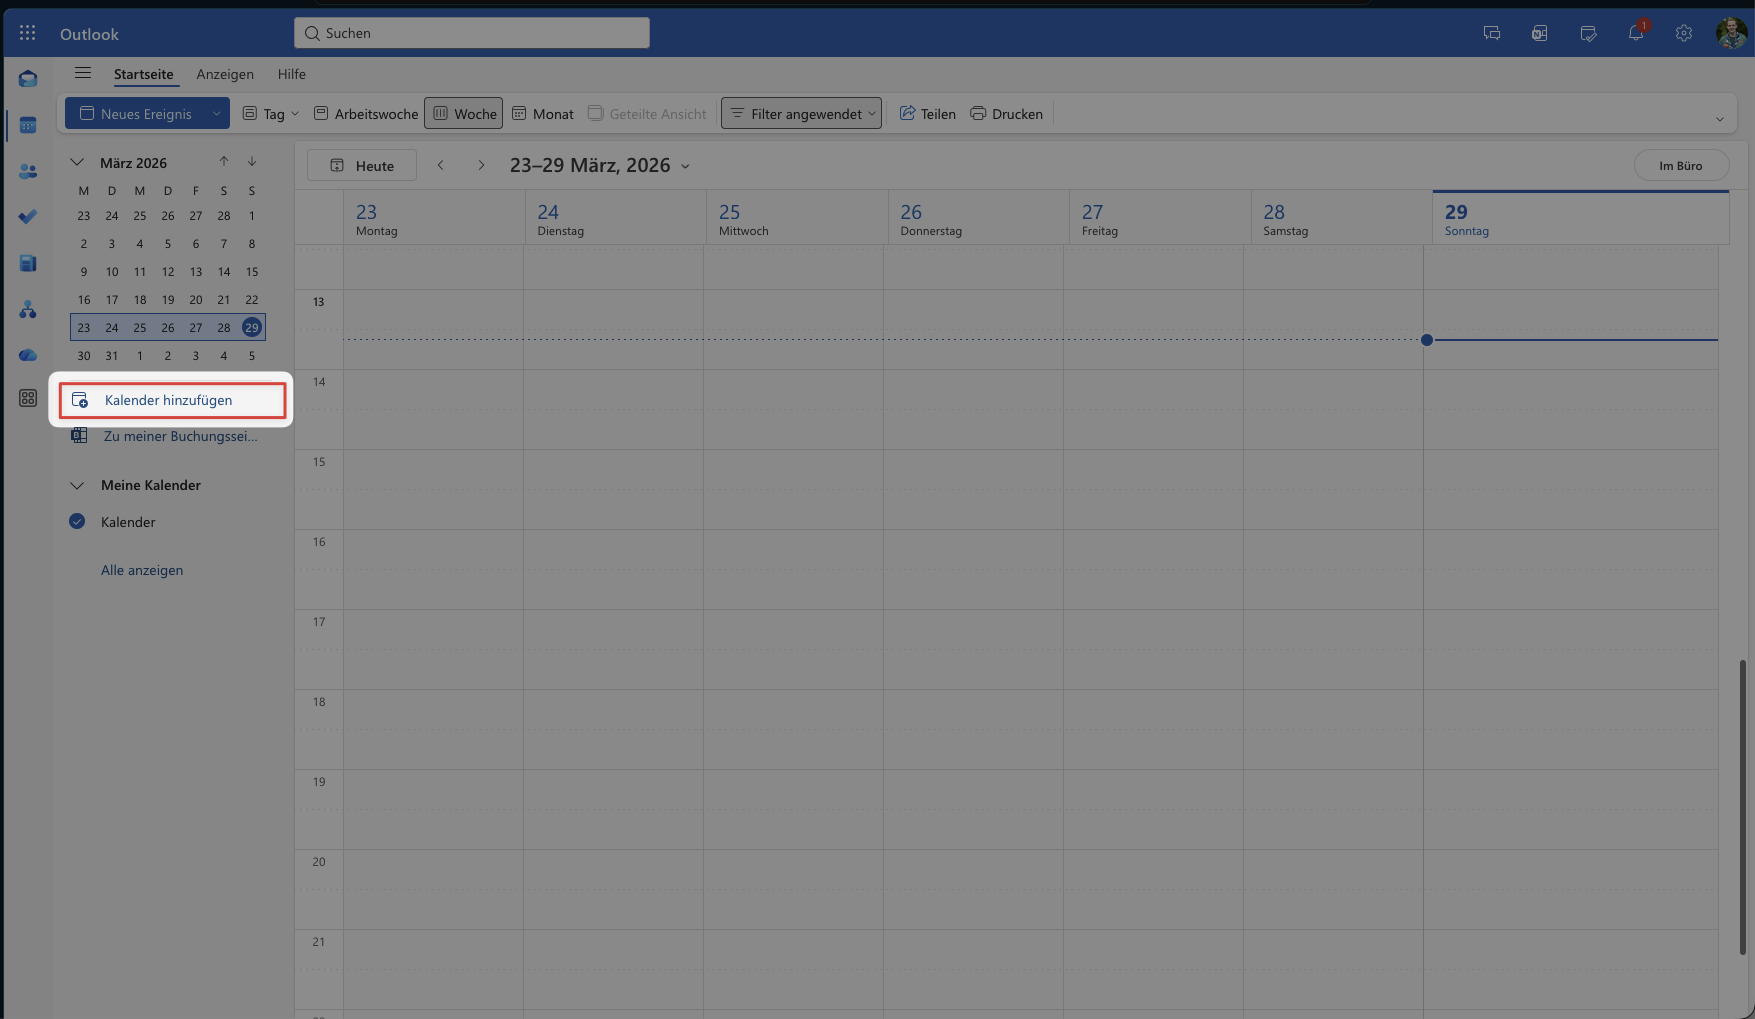
1. Create a new calendar
- Open Outlook Web and switch to the Calendar view.
- In the left sidebar, click «Add calendar».
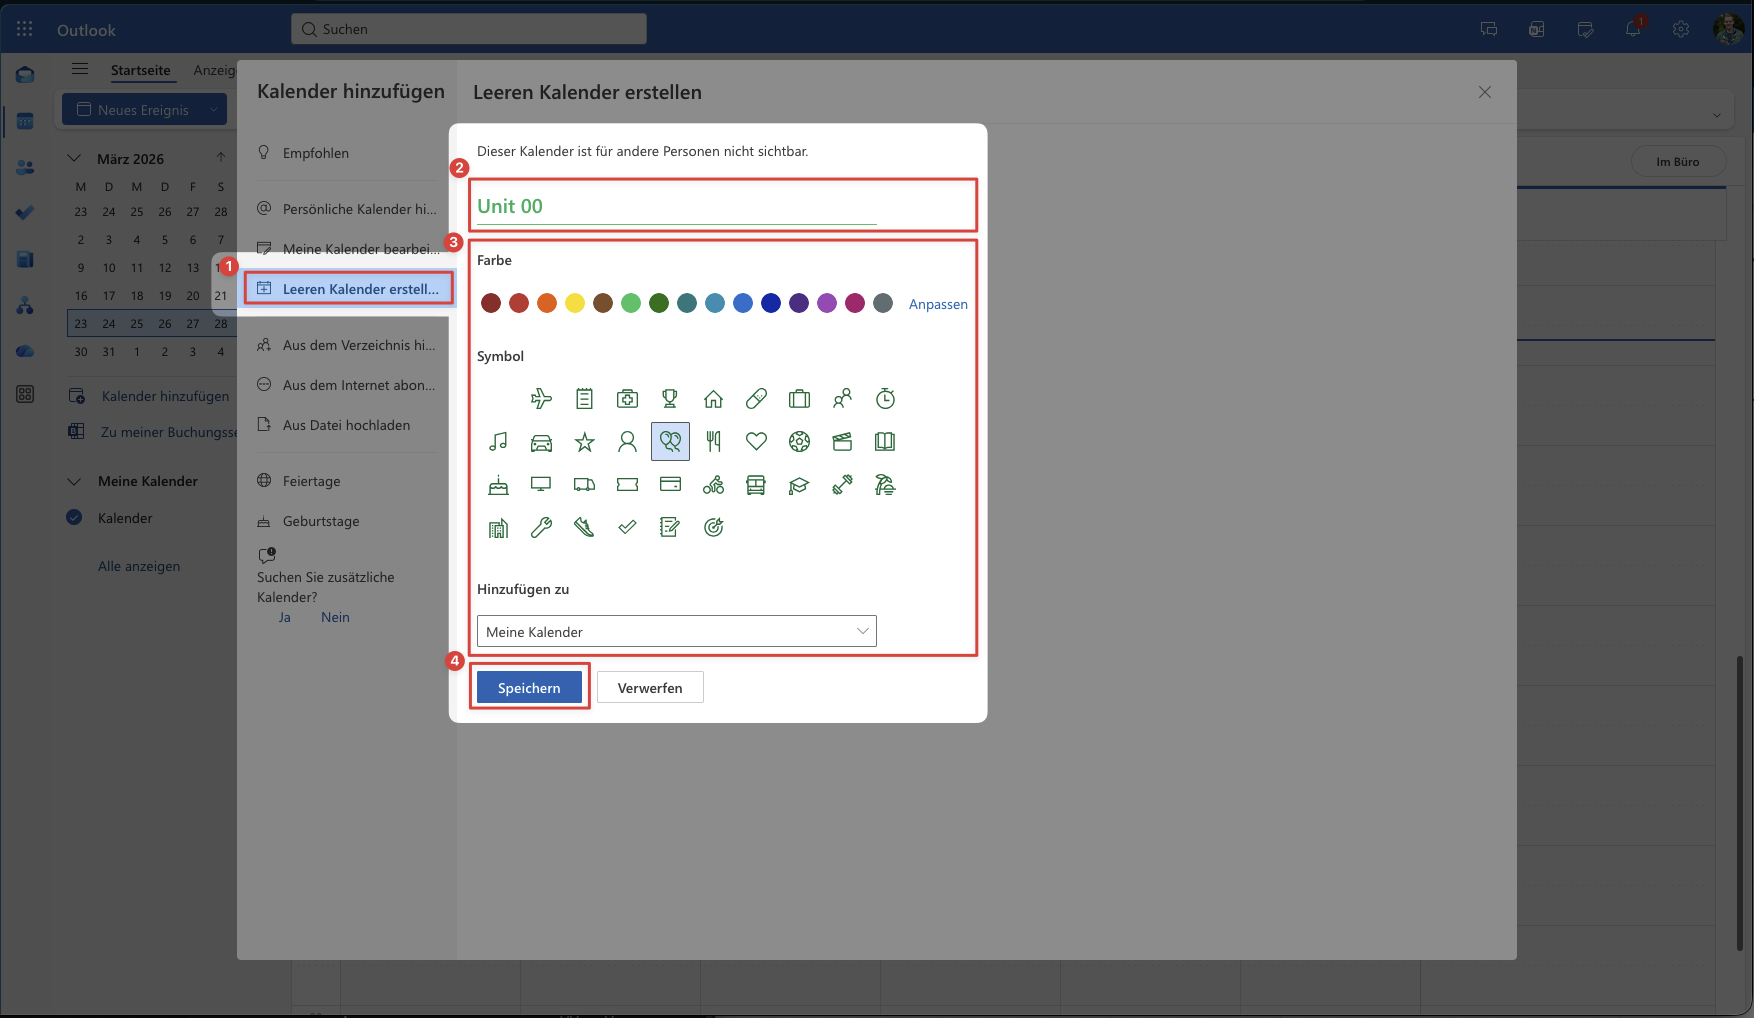
- Select «Create blank calendar» ①.
- Enter a name for your calendar (e.g. «Unit 00») ②, optionally set a colour and icon ③.
- Click «Save» ④.
2. Share the calendar with your co-Unit Leaders
All Unit Leaders of your unit should be able to add and edit events. To grant edit access:
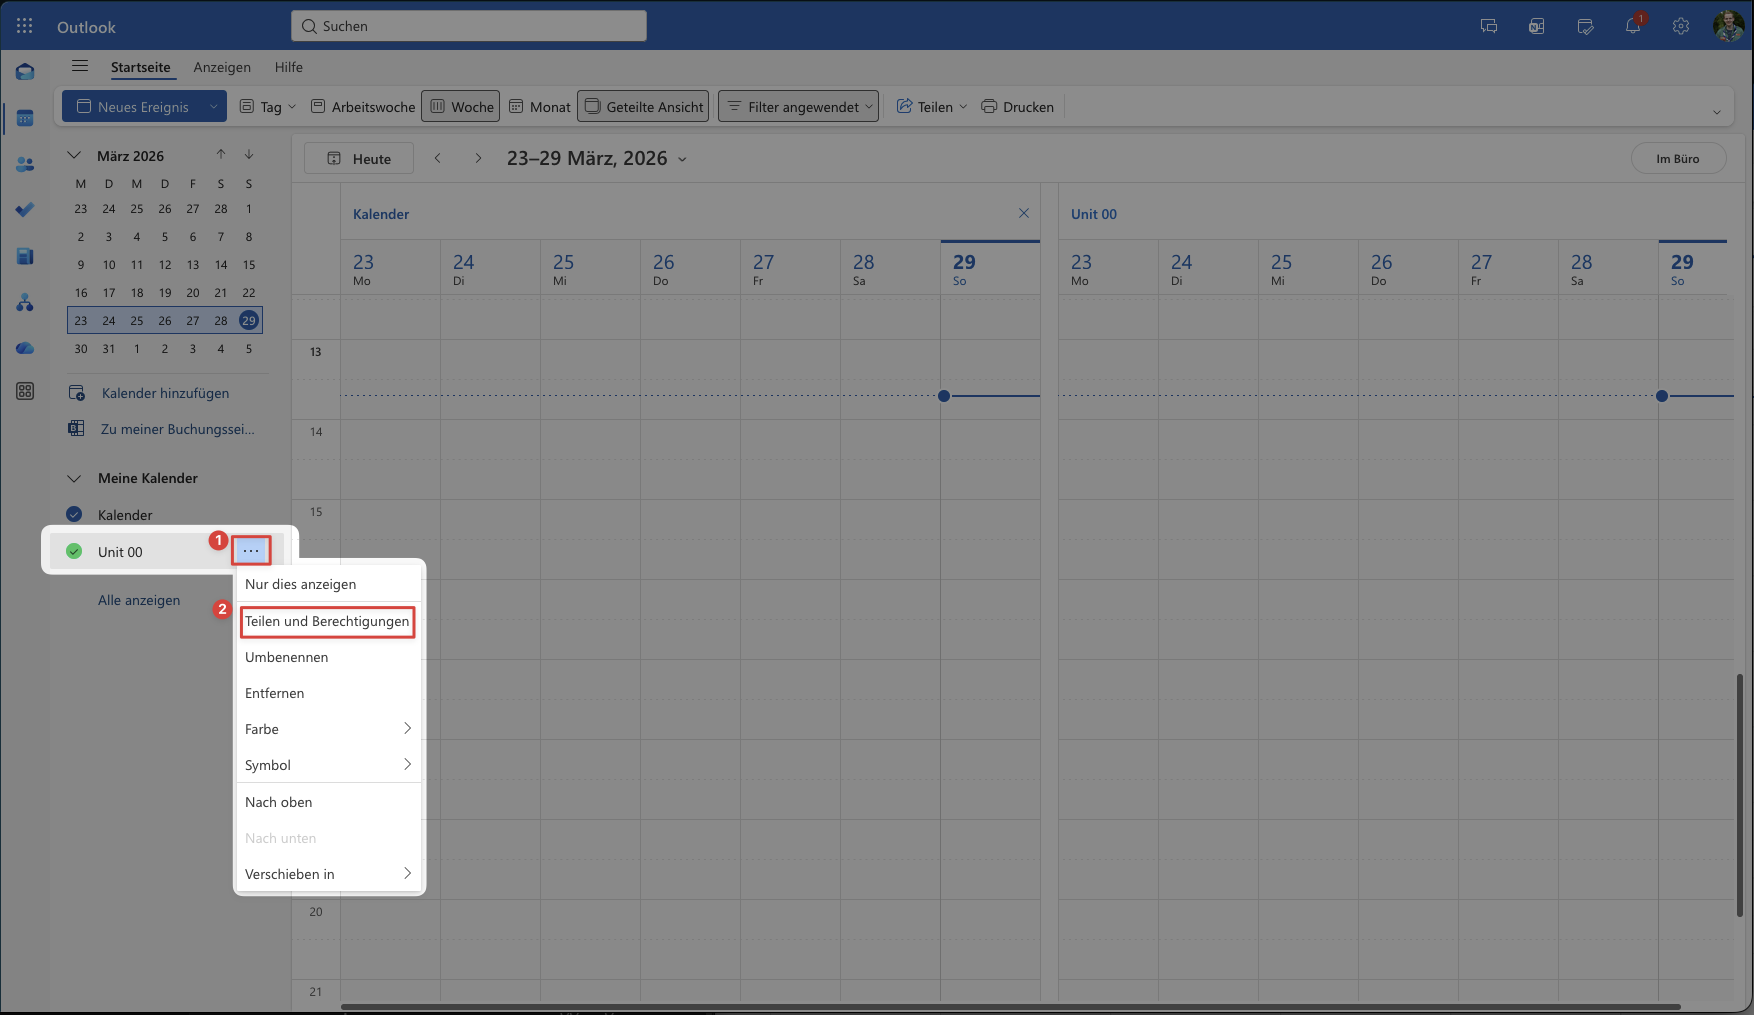
- In the left sidebar, hover over your calendar and click the «…» menu ①.
- Select «Sharing and permissions» ②.
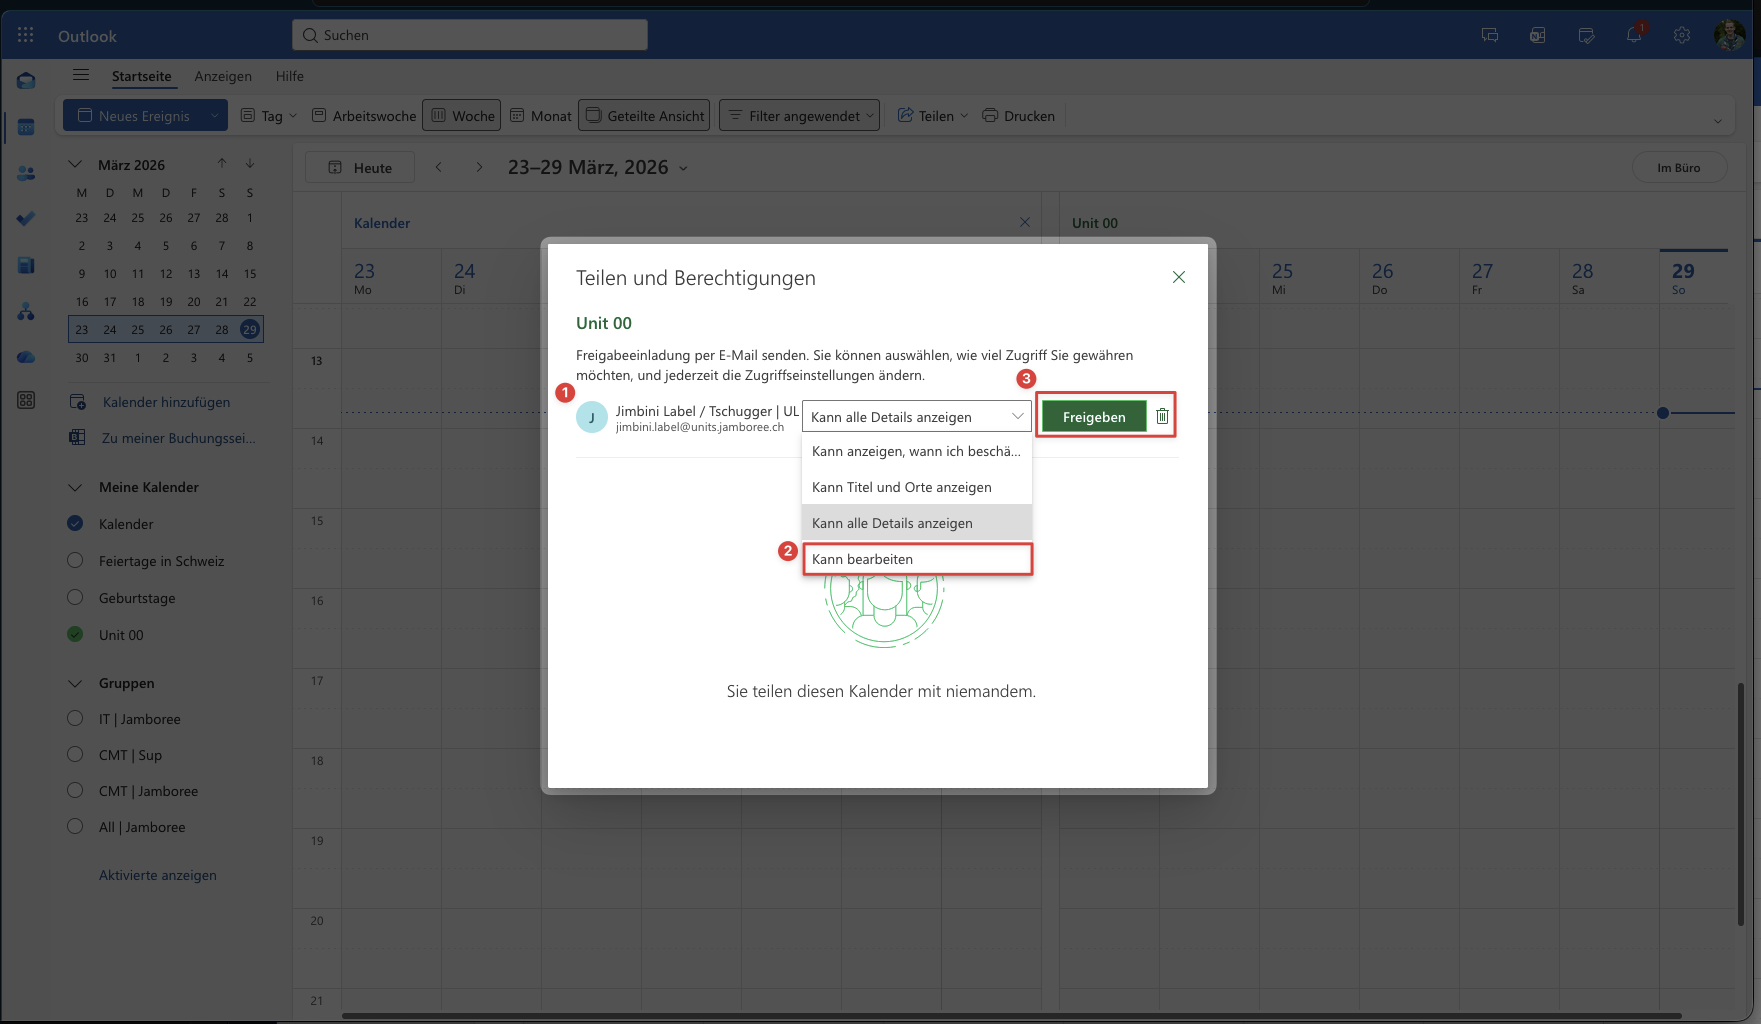
- Enter the name or email address of a co-Unit Leader ① and select them.
- Set the permission to «Can edit» ② and click «Share» ③.
- Repeat for each co-Unit Leader.
- Unit Support would be happy if you also share the calendar with your US.
3. Publish the calendar and get the ICS link
The ICS link allows your participants to subscribe to the calendar in any calendar app (e.g. Google, Apple, Outlook). Share this link only within your unit – it is publicly accessible to anyone who has it.
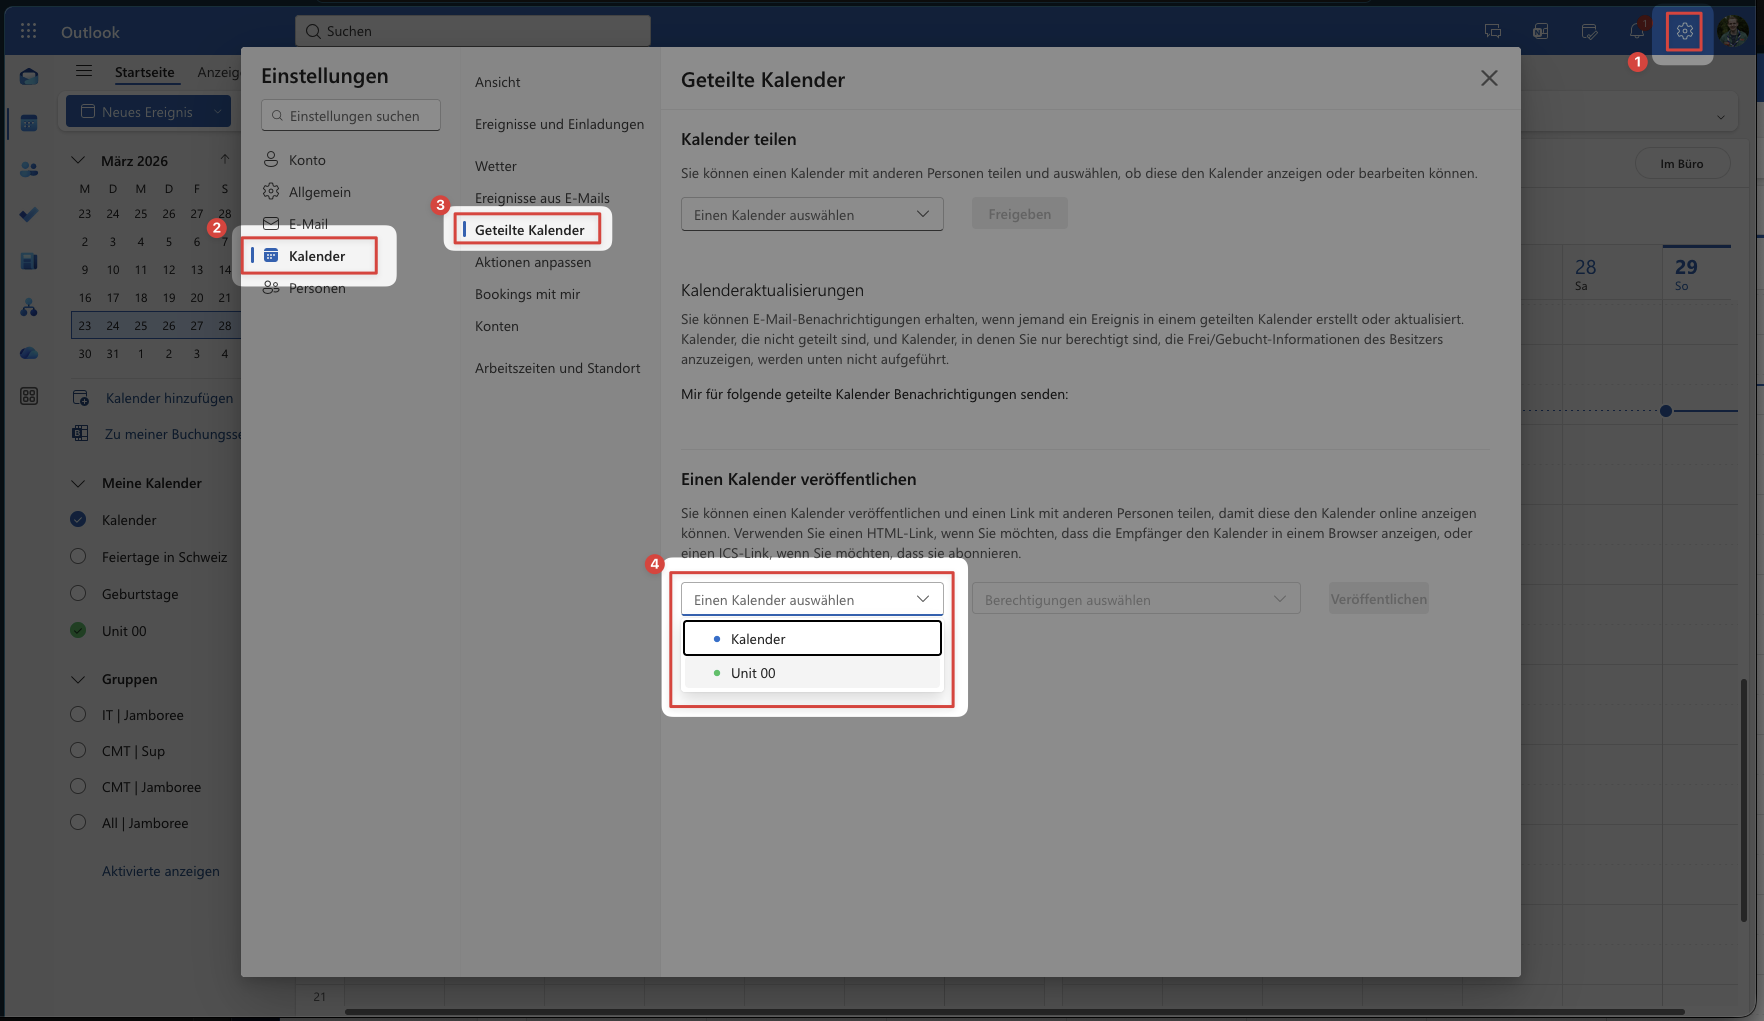
- Open Settings (gear icon ①, top right) → «View all Outlook settings».
- Navigate to «Calendar» ② → «Shared calendars» ③.
- Under «Publish a calendar», select your calendar from the dropdown ④ and click on it.
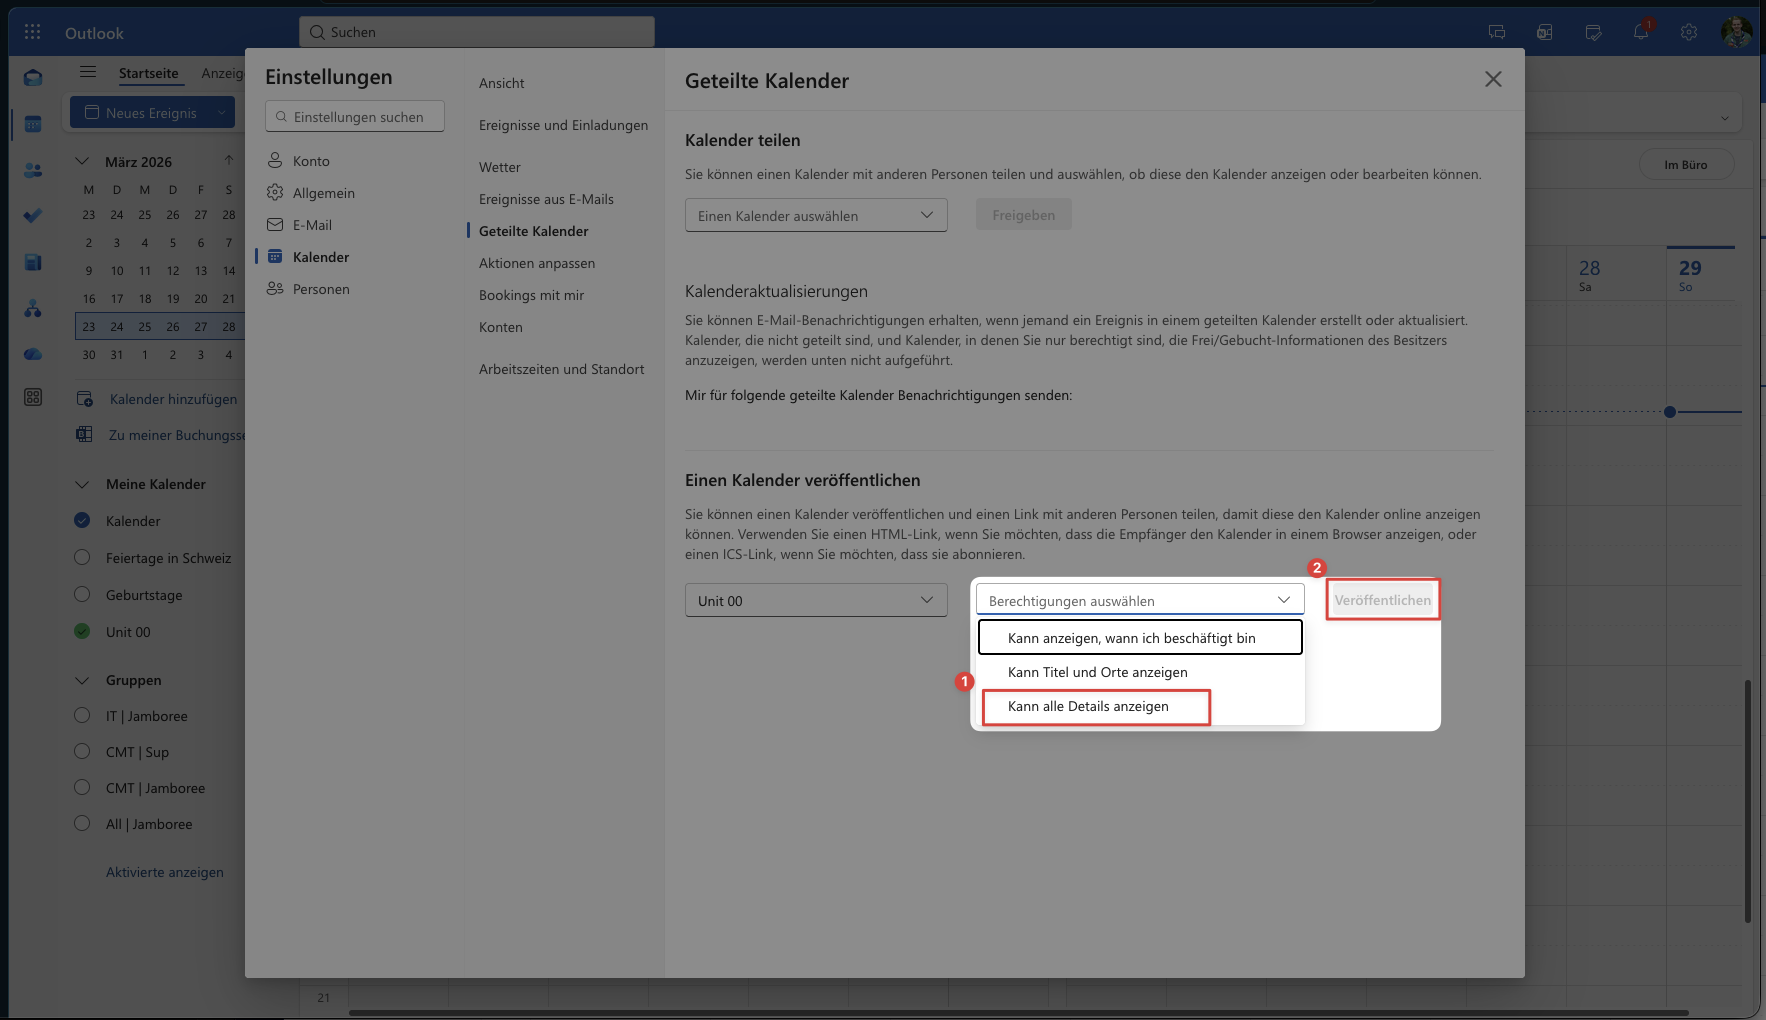
- Set permissions to «Can view all details» ① and click «Publish» ②.
- Copy the ICS link ✅ and share it with your participants (e.g. via email or WhatsApp).
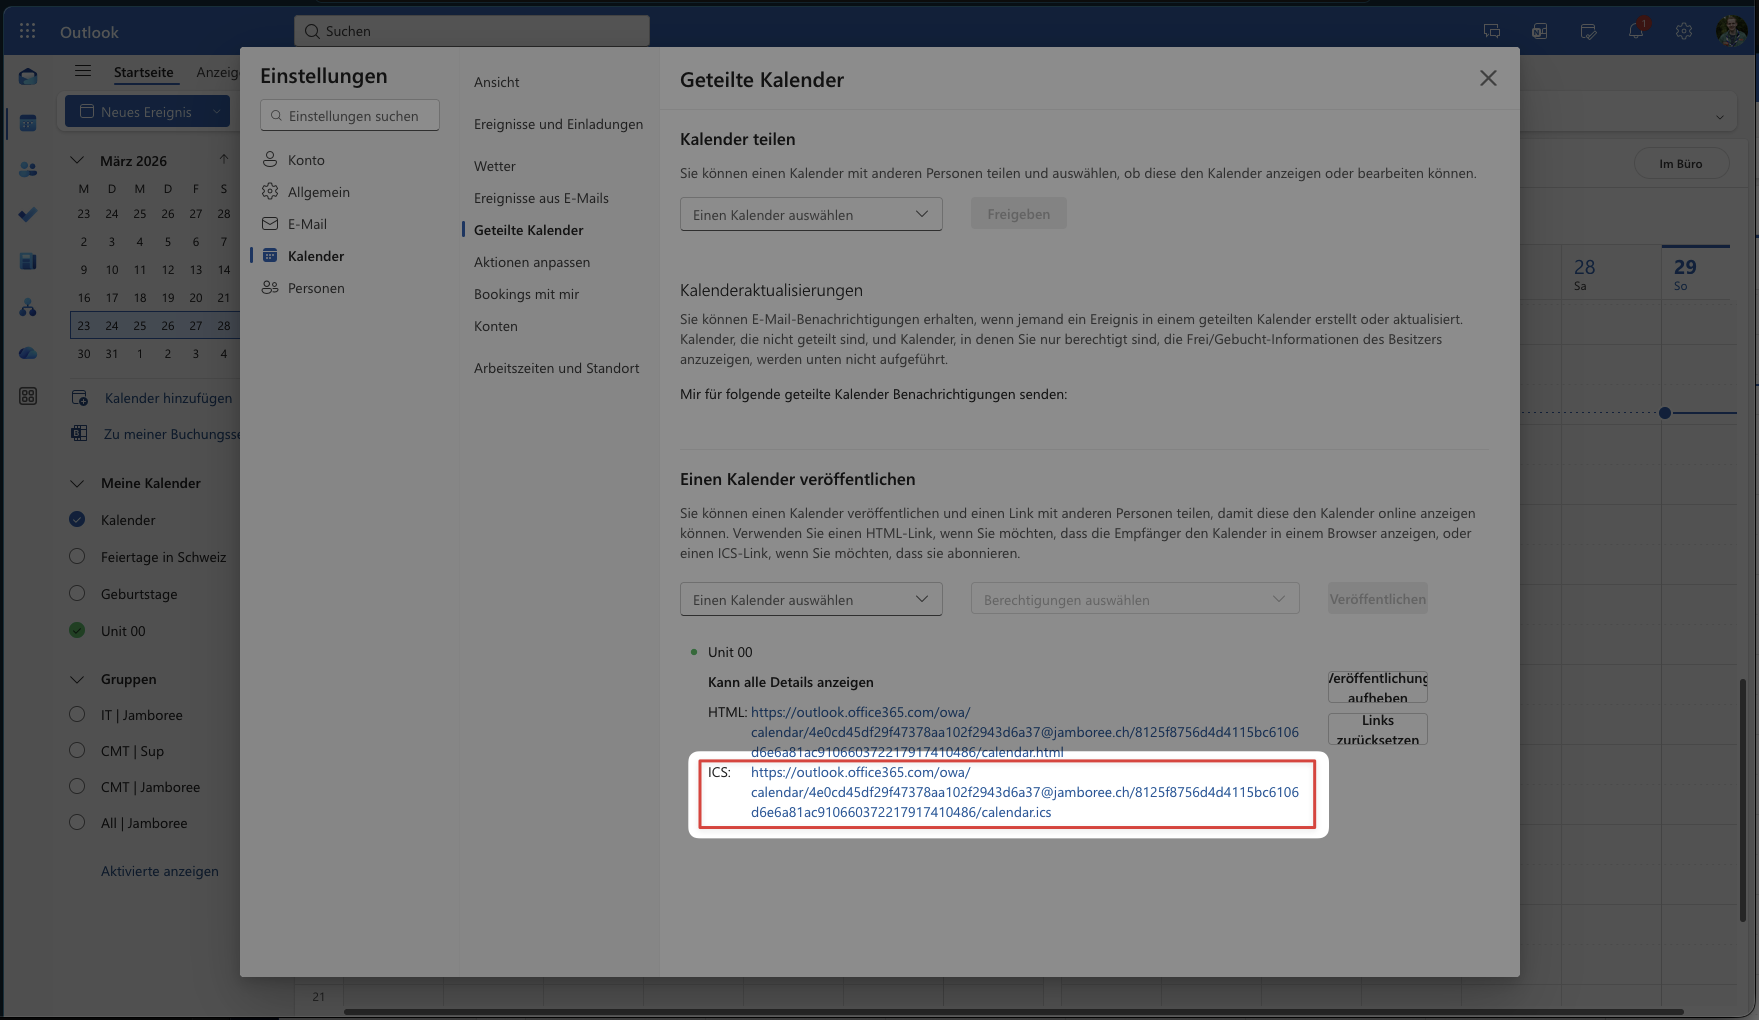
Important: The ICS link is publicly accessible to anyone who has it. Do not post it publicly – share it only within your unit.
4. Add events to the calendar
- In the calendar view, click on the desired date.
- Enter title, date, time and location.
- Make sure the correct calendar is selected (not your personal one).
- Click «Save».
Subscribers receive new and updated events automatically. Depending on the app, synchronisation can take up to 24 hours.
Unpublish or reset the ICS link
To deactivate the ICS link: Settings → Calendar → Shared calendars → «Unpublish» or «Reset links».
If you unpublish or reset the link, all participants will need to re-subscribe using the new ICS link.
Further details in the official Microsoft documentation (EN): Share your calendar in Outlook on the web
Support
If you need any help, please contact Vivo over Teams or email Jamboree IT.